If you're looking for a way to keep your phone or GPS device in a convenient location while you drive, a dash mount adhesive is an excellent solution. However, figuring out how to install one properly can be challenging. In this article, we'll take you through the steps to make the process as easy as possible.
Shop Our Adhesive Base Mounts

What is a Dash Mount Adhesive?
A dashboard cell phone holder adhesive is a small, yet powerful, device that attaches to your car's dashboard and provides a surface to hold your phone or GPS device securely in place. The adhesive is typically made of a strong, durable material that can withstand the weight and movement of your device while driving!
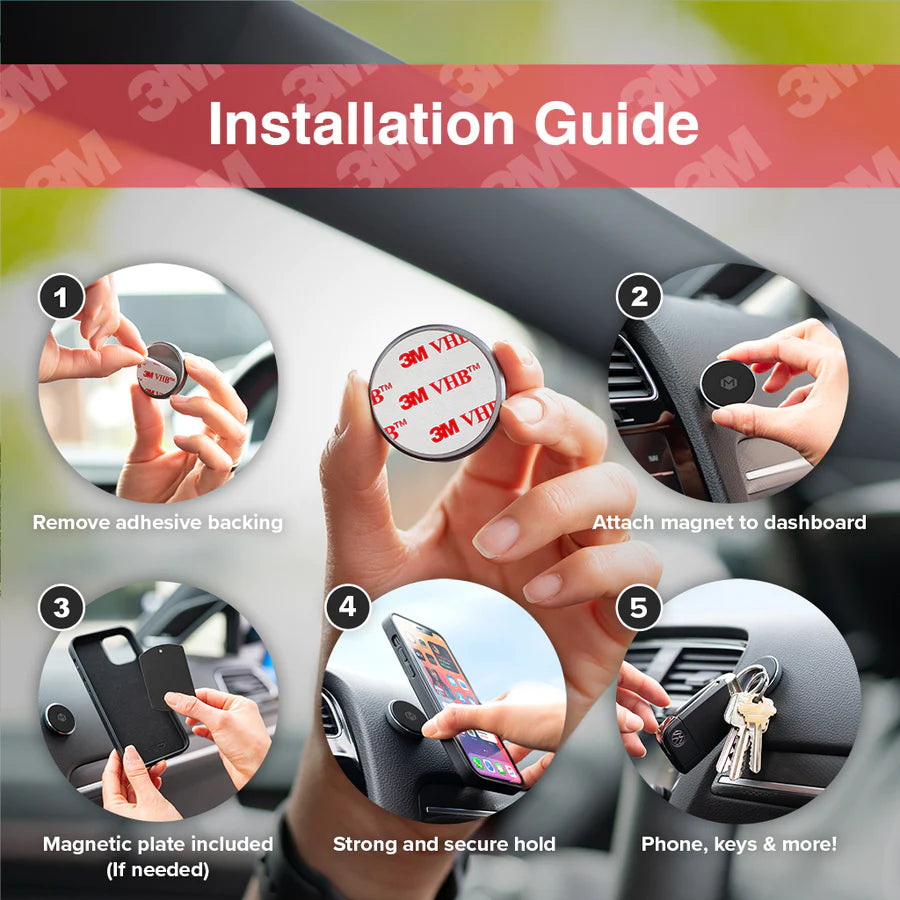
Step-by-Step Guide to Install Dash Mount Adhesive
Step 1: Clean the Dashboard
Before you install the dash mount adhesive, cleaning the dashboard base thoroughly is essential. Dirt, dust, and debris can prevent the adhesive from sticking correctly, so you'll want to use a gentle cleaner and a microfiber cloth to remove any buildup.

Step 2: Position the Adhesive
Once your dashboard is clean and dry, it's time to position the adhesive. Choose a location that is easy to reach and won't block your view of the road. You may also want to consider the charging cable length for your device and position the adhesive accordingly.

Step 3: Apply Pressure
After you've positioned the adhesive, press down firmly to ensure it sticks securely to the dashboard. Hold the adhesive in place for at least 30 seconds to give the adhesive time to bond with the dashboard surface.

Step 4: Wait Before Attaching Your Device
Although you may be eager to attach your device to the dash mount adhesive, it's essential to wait at least 24 hours before doing so. This will give the adhesive time to set and ensure a secure hold for your device.
Tips for Installing Dash Mount Adhesive
- Avoid applying the adhesive in extreme temperatures or direct sunlight, as this can impact its ability to stick.
- Consider using a dash mount adhesive with an adjustable arm or swivel feature to provide more flexibility in positioning your device.
- If you're concerned about the adhesive leaving residue on your dashboard, consider using a removable adhesive instead.
Conclusion
Installing a dash mount adhesive is a simple process that can make a big difference in your driving experience. By following these steps and tips, you'll have a secure and convenient place to keep your phone or GPS device while on the road.
Frequently Asked Questions About Installing Dash Mount Adhesive
Q: How do you attach a dash mount?
A: To attach a dash mount securely to your car's dashboard, follow these steps:
- Clean the dashboard thoroughly
- Choose a convenient location
- Peel off the protective backing and press the adhesive firmly
- Hold in place for at least 30 seconds
- Wait for at least 24 hours before attaching your device.
By following these simple steps, you can attach a dash mount to your car's dashboard with confidence
Q: Why wont my phone holder stick to my dashboard?
A: Your phone holder may not stick to your dashboard due to a dirty surface, extreme temperatures, high humidity, low-quality adhesive, or unsuitable dashboard material. Cleaning the surface, using a better quality phone holder or considering alternative mounting options can help resolve the issue.
Q: How do you remove 3M adhesive from the dashboard?
A: Removing 3M adhesive from the dashboard can be done by following a few simple steps. First, apply a small amount of rubbing alcohol or adhesive remover to a clean cloth. Then, gently rub the cloth onto the adhesive, working in a circular motion. Be sure to apply enough pressure to loosen the adhesive, but avoid using excessive force that could damage the dashboard. Once the adhesive has been removed, clean the area with a gentle cleaner and a microfiber cloth to remove any remaining residue. Repeat these steps if necessary, and be patient, as the process may take some time.
Q: How do I get my car phone holder to stick again?
A: To get your car phone holder to stick again, you can try cleaning the suction cup or adhesive with a damp cloth to remove any dirt, dust, or debris that may be interfering with the grip. If the suction cup or adhesive is still not sticking, you can try moistening it with a small amount of water or saliva, which can help create a better seal. Additionally, make sure the surface you attach the holder to is clean and dry before reapplying. If these steps do not work, you may need to replace the suction cup or adhesive with a new one.